
Fastlane是一套使用Ruby写的自动化工具集,旨在简化Android和iOS的部署过程,自动化你的工作流。它可以简化一些乏味、单调、重复的工作,像截图、代码签名以及发布App
安装
安装xcode命令行工具
xcode-select –install,如果没有安装,会弹出对话框,点击安装。如果提示1
xcode-select: error: command line tools are already installed, use "Software Update" to install updates
表示已经安装
安装Fastlane
1 | 我这里使用第一种方式安装的 |
ERROR: While executing gem … (Errno::EPERM) Operation not permitted - /usr/bin/commander1
执行:
sudo gem install -n /usr/local/bin fastlane1
完成之后执行:
fastlane –version1
确认下是否安装完成和当前使用的版本号。
fastlane installation at path:
/Library/Ruby/Gems/2.3.0/gems/fastlane-2.117.1/bin/fastlane
[✔] 🚀
fastlane 2.117.1
1 |
|
1 | 1. 📸 Automate screenshots |
选几都行,后续我们自行根据需求完善就可以,这里我选的是3。1
2[17:38:53]: Please enter your Apple ID developer credentials
[17:38:53]: Apple ID Username:
按照提示输入开发者账号和密码,登录成功后会提示你是否需要下载你的App的metadata。点y等待就可以。
文件夹结构
初始化成功后会在当前工程目录生成一个fastlane文件夹,文件目录为下。
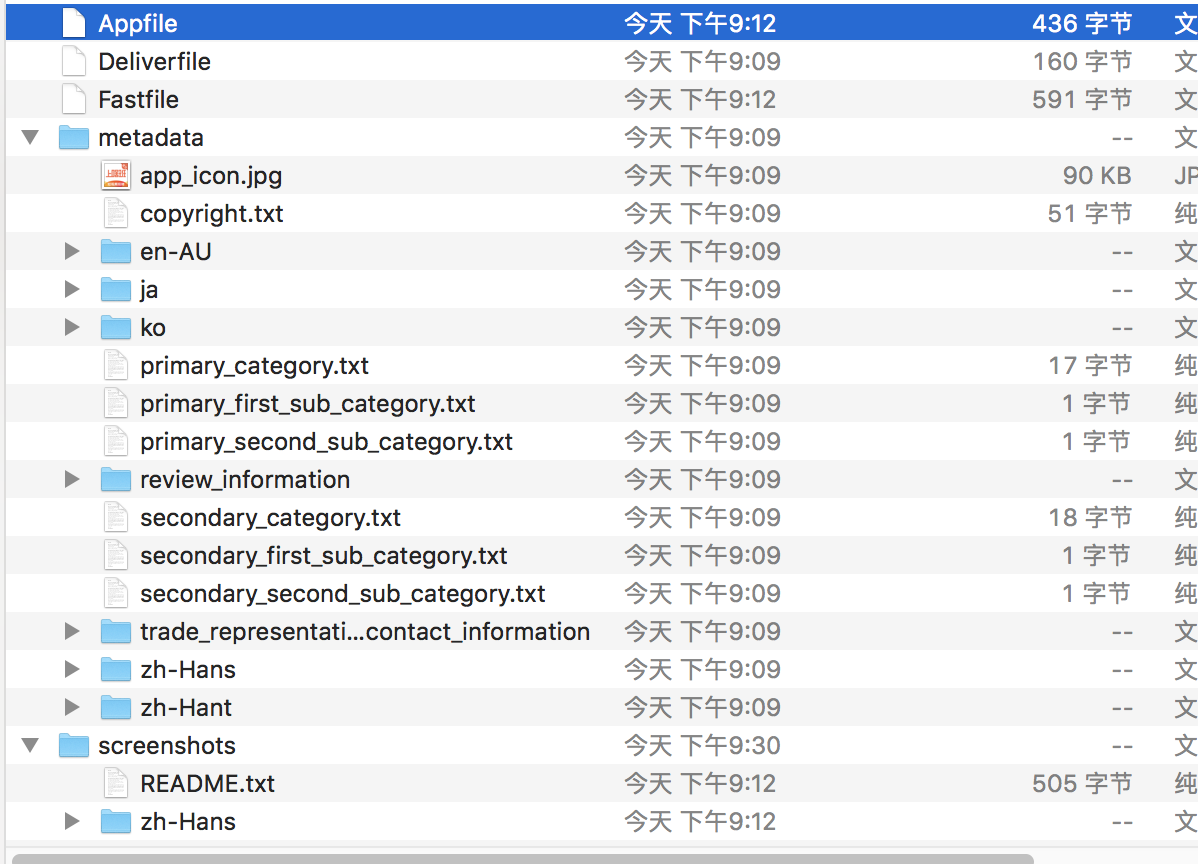
- metadata和screenshots分别对应App元数据和商店应用截图。
- Appfile主要存放App的apple_id team_id app_identifier等信息
- Deliverfile中为发布的配置信息,一般情况用不到。
- Fastfile是我们最应该关注的文件,也是我们的工作文件。
Fastfile文件内容如下:1
2
3
4
5
6
7
8
9
10
11
12
13
14
15
16
17
18
19
20
21
22
23
24# This file contains the fastlane.tools configuration
# You can find the documentation at https://docs.fastlane.tools
#
# For a list of all available actions, check out
#
# https://docs.fastlane.tools/actions
#
# For a list of all available plugins, check out
#
# https://docs.fastlane.tools/plugins/available-plugins
#
# Uncomment the line if you want fastlane to automatically update itself
# update_fastlane
default_platform(:ios)
platform :ios do
desc "Push a new release build to the App Store"
lane :release do
build_app(workspace: "XXX.xcworkspace", scheme: "XXX")
upload_to_app_store
end
end
之前我们了解了action,那action的组合就是一个lane,打包到蒲公英是一个lane,打包到应用商店是一个lane,打包到testflight也是一个lane。可能理解为任务会好一些。
打包到蒲公英
这里以打包上传到蒲公英为例子,实现我们的一行命令自动打包。
蒲公英在Fastlane是作为一个插件存在的,所以要打包到蒲公英必须先安装蒲公英的插件。
打开终端输入fastlane add_plugin pgyer
更多信息查看蒲公英文档
新建一个lane:
1 | desc "打包到pgy" |
option用于接收我们的外部参数,这里可以传入当前build的描述信息到蒲公英平台
执行
在工作目录的终端执行
1 | fastlane test desc:测试打包 |
打包成功1
2
3
4
5
6
7
8
9
10
11
12
13[10:17:35]: Upload success. Visit this URL to see: https://www.pgyer.com/feixiuman
+------+------------------+-------------+
| fastlane summary |
+------+------------------+-------------+
| Step | Action | Time (in s) |
+------+------------------+-------------+
| 1 | default_platform | 0 |
| 2 | gym | 129 |
| 3 | pgyer | 12 |
+------+------------------+-------------+
[10:17:35]: fastlane.tools finished successfully 🎉